I love to cook and bake but I had never attempted yogurt. All my friends that raised goats would share their goat milk yogurt with me and I was always so impressed that they could make their own yogurt. I don’t know why yogurt seemed so intimidating.
I baked my own bread from wheat I ground myself, made my own pasta from eggs I got from my own chickens, and made my own cheese. But for some reason yogurt scared me.
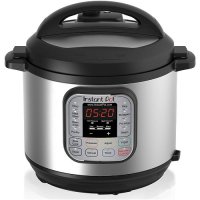
When we first got an instant pot we looked at a couple different models. Some had a yogurt setting and others didn’t. I didn’t pay any attention to that, I was not going to make yogurt.
I have made so many different things in the instant pot. I used it so much that I even got a second pot. I have had several friends ask me for help and advice when they first get a new instant pot. I’m an instant pot expert…I could make anything…except yogurt.
I guess I finally need to give it a try. What’s the worse thing that could happen? A wasted gallon of milk. That’s not really a big deal. Depending on where in the country you are that could range in price from $1-5. That’s a good price to pay for an experiment, whether it works or fails.
It turned out to be so easy and nearly impossible to mess up. The times I have made mistakes while making yogurt, I was able to correct the problem and it delayed the process, but still turned out just fine.
This recipe is for plain unsweetened yogurt. If you prefer flavored you can add sweetener or fruit once it’s done.
Plain Unsweetened Instant Pot Yogurt
You will need 1 gallon of milk and 2 Tablespoons of yogurt (you could do 1/2 gallon if you prefer, I have a large family and it goes quick.)
Put 1 gallon of milk in the instant pot. Cover with the glass lid or a regular lid with the seal removed.
Push the yogurt button and the adjust button. Some models you will need to push the yogurt button twice to get it to the more function. The screen should say “boil”. It will change to “yogurt” when it’s ready. Remove the lid and let it cool to 110 degrees. I submerge the pot in cold water to speed the cooling process.
Once it’s cool, add 2 tablespoons of yogurt and whisk it in.
Put on the lid again and push the yogurt button, adjust so it is now on “normal” not “more” and set the time anywhere between 8 and 12 hours. I set mine for 12 hours and I do it before bed. When I wake up in the morning I make sure it has been going at least 8 hours, but I don’t wait for 12. Your yogurt should have thickened up and is now ready to eat.
Some people like it warm, others prefer it cold. If you like it cold, It’s not quite ready to eat yet.
If you prefer thicker yogurt you can pour it into a nut milk bag to strain some of the liquid out to make greek yogurt. This is how I prefer it, but you will get less yogurt. Strain it to any thickness you like.
One morning I woke up and I had a pot of warm milk. It hadn’t thickened. I forgot to put the yogurt in it. It wasn’t a big deal, I just added it and waited 8 more hours and it turned out perfect.
One other time I forgot to take the seal out of the lid on the pot and I had some gross, tomato onion flavored yogurt. That’s when I quit using the sealing lid and started using the glass lid. I know myself well enough to know that I will continue to forget removing the seal. So I have to avoid that lid all together. The seal has a great superpower of holding onto flavors and sharing them in the next batch of food. Keep that in mind if you ever attempt cheesecake.
Remember not to eat it all. Save a couple tablespoons for the next batch so you don’t have to buy more for a starter.
Making yogurt turned out to be super easy, it is usually much more cost effective than purchasing yogurt, and it’s delicious. The downside is the time it takes. Making it overnight is a great solution.
If you haven’t attempted yogurt in your ‘pot yet, go get yourself a gallon of milk, I’ve tried skim, 1% and whole, they all work, and let the experiment begin. Leave a comment letting me know how it turned out. Do you prefer it plain or did you flavor it? And when it tastes funny because you left the seal in, definitely let me know, so I’ll know I’m not the only one who makes mistakes.


