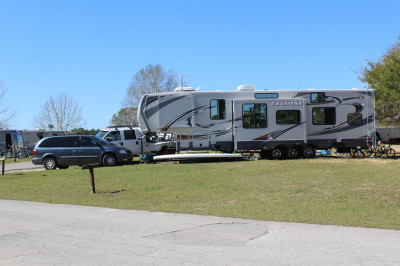
We’ve been on the road fulltime since September 2016 and just got back from an EPIC trip to Alaska, where we saw more rookie RVers struggling to set up their RV than ever. In addition, recently we have had a lot of people reach out to us that are just starting their RV adventures, looking for information. So we decided to put together this list of things to help get your RV hooked up right. This post is sponsored by Road & Home, and we were surprised at how much their “Ready for the Road” checklist matched what we already carry in our RV.
Whether you’re new to the RV lifestyle, a weekend warrior or you’ve been living or traveling in your RV for years, there are just certain items you should always have on board with you to make setting up easier. Here’s our list of items that will help you get your RV set up in your cousins driveway, an RV resort, your local state park, or ready to go off the beaten path.
1. Leveling equipment: First things first, you pull into a site, and hope that your RV is fairly level. Don’t you hate when your RV doors slowly creep closed or the shower doesn’t drain all the way because the RV isn’t level. We might not always stand up straight, but certainly can tell when we are not level. We keep a pair of small levels in a cabinet just inside the front door of the RV, so when we park at a new location, they are always easily accessible. In addition to the levels, a couple things you should have handy to make sure everything is straight:
*Bubble levels: I mentioned these already, but getting some mounted levels will help establish a regular reference point. Get your rig good and level, and mount a couple of these in easy to see spots. There are many shapes, sizes and mounting options, find what works best for you, and run with it. Then of course there is the bathroom door test!
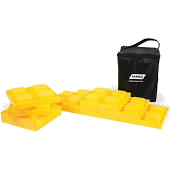
*Leveling Blocks: These are a necessity for us! We have several different sets that use the same stacking pattern, that allow us to use them in many different configurations. We use them under the tires on a low side, under the landing gear, stabilizer jacks, and even sometimes under the sewer hose support when there are variations in the ground level.
*Anderson Levelers: Although we don’t carry any of these anymore, we love them. We had a set of them when we traveled in a travel trailer, and wish we would have been able to use them with our 5th wheel, but being a triple axel trailer, the wheels are just too close together.
2. Water: Fresh potable water is pretty important! It hydrates you, it cleans your dishes, you bathe in it, etc… Getting hooked up to water or getting your fresh water tanks filled can be either super simple, or require some various parts and pieces that you may or may not have with you to make it easier.
*Hose: I know this sounds obvious enough, but we have had issues with this before. IE: Not having enough hose or having a hose split on us. We primarily use a total of 60 feet of hose in line that usually gets the job done, but there have been a few instances where we have needed to add an additional section of hose to be able to reach the faucet. We carry with us at least one new unused extra hose. You need to make sure that your hoses are drinking water safe and rated to at least 60 PSI. In addition to our fresh water hoses, we also carry a hose to hook into the black tank sprayer. This one is not safe for potable water, and it is only used to flush tanks. Typically when we upgrade a fresh water hose, the old one is demoted to tank-flushing duty.
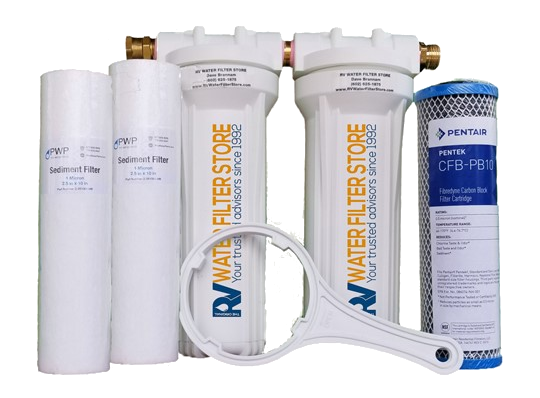
*Water Filter: We have been many places where the water coming in was questionable. It is safe for consumption, but sometimes there are minerals and other solids coming in from the faucet. For filtering the water coming into your RV there are many different systems available, but we use a 2-filter home system we got from the RV Water Filter Store. Our system removes sediment, chlorine, taste/odor, VOC’s, and reduces lead and heavy metals. The filters are available at just about anywhere, and are good for 6 months.
*Water Pressure Regulator: These regulate the water pressure, as some places have more pressure than your RV’s water system is designed to handle. We have a couple different varieties of water filter regulators on board our RV.
*In-line water pressure regulator: It reduces incoming water pressure to a consistent 45-50 PSI. It protects equipment, prevents pipe damage and increases equipment longevity. They have standard garden hose thread inlets and outlets to enable easy hook-ups.
*Adjustable water pressure regulator: The name explains it all; this type typically has a gauge you can read the pressure coming in, and adjust it up or down to optimize the pressure coming in from the faucet.
*Other Random Parts: The Hose and filters are the meat and potatoes of our RV’s fresh water system, but there are several other things we keep on hand to make hooking up simple.
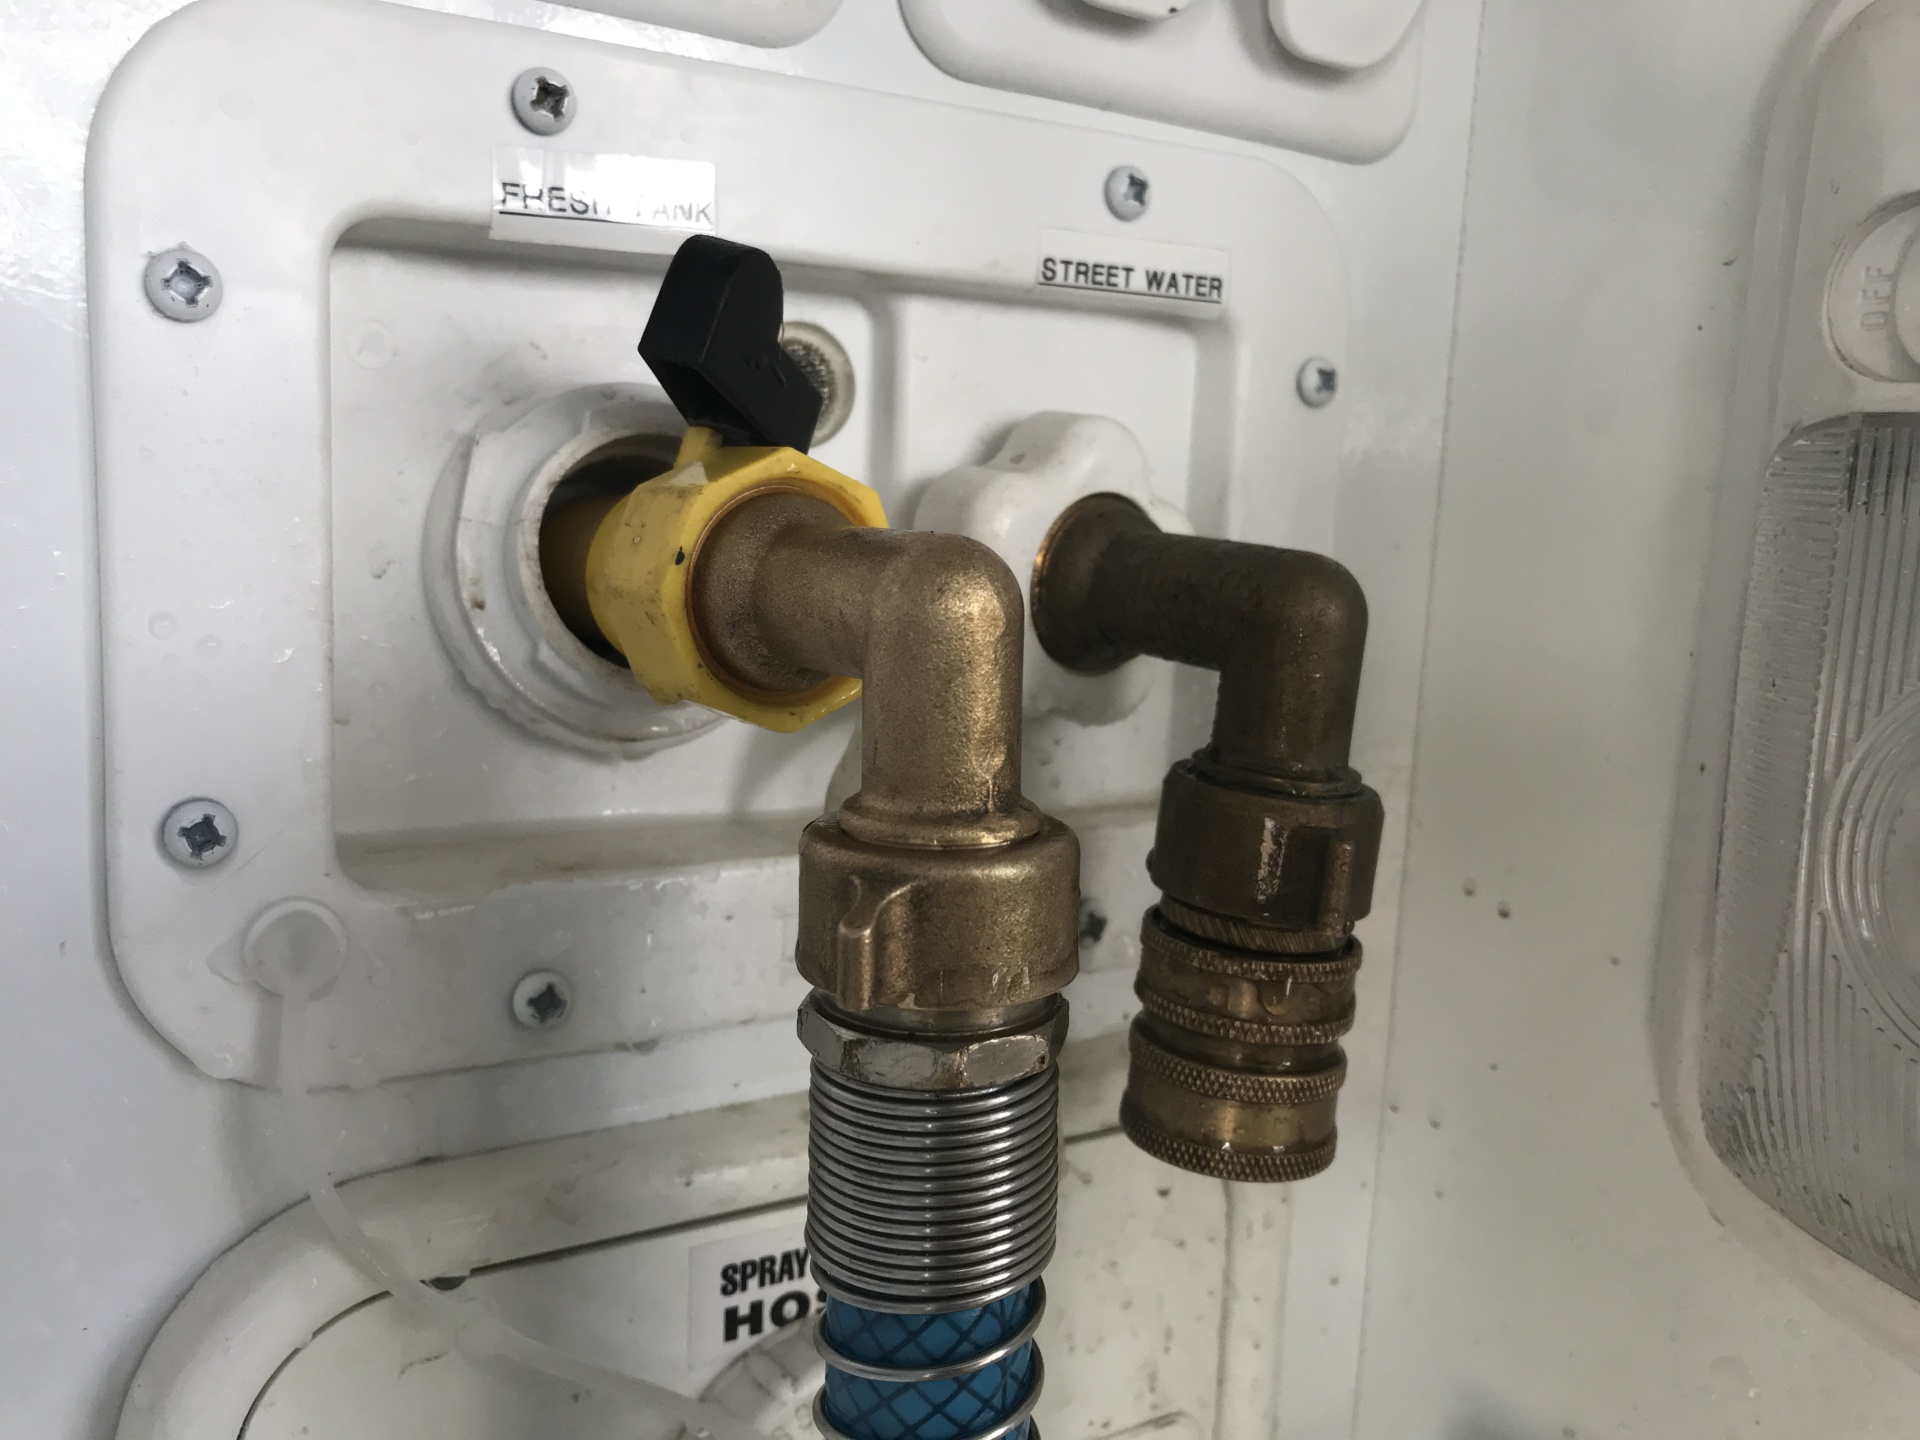
*90 degree elbow: The elbow adapter helps you connect a hose in a tight space without bending, kinking or straining the hose. We have one on the city water inlet; that way our hose is directed straight down out the hose port in the floor of our RV’s utility box.
*Quick connect/disconnects: These go on the ends of the hoses, and allow for quick connection and disconnection from the various parts of the water system. We use them on hose to our RV’s city water connection and where it connects to the filters.
*Tank filler with shut-off valve: This is specifically for filling the fresh water tank. This goes on the end of the fresh water hose, and fits nicely into the tank filler port, and allows you to maintain control of the water pressure, without being at the faucet.
*Dual shut-off hose Y: You never know what the water connections might be like in RV parks and campgrounds. We have this hooked up right before my filters, it allows me to hook up an additional hose if I want to rinse something off, fill a bucket, or whatever we may need an additional water source for. This connector has a shut-off valve for each outlet, and allows the hoses you hook up to the connector to operate separately. It also gives us another way to isolate a section of the hose if there is a leak, or if we need to remove pressure from the lines as we break down the system on moving day.
*Hose washers: These little guys go at every point within the water system that there is a 3/8 thread point. When you connect hoses to fresh water spigots or other hoses, you may need to use a hose washer to create a leak-proof connection. Without the washer, you may lose water and pressure at the connection. These come in with or without a mesh screen, and we carry a bag full of them, as you never know when you may need one.
*Hose clamps: You never know when these might come in handy!
3. Sewer: What comes in must go out. This is definitely the dark side of RVing. Along with being the dirty part, it’s also something that requires attention.
*Sewer Hose: We carry a couple different lengths of sewer hose. As with the water hose, my standard 15’ length usually is all I need, but there have been some instances where I have needed an additional section to make it to the hole.
Sewer hose adapters: I could spend all day describing the various different shapes and sizes of adapters that are available. We like to keep a couple different elbows, and connectors that allow me to turn a sharp corner, connect a couple different lengths of hose, or maneuver around obstacles on the ground.
*Sewer Hose Support: I don’t know if I need to explain this more, but they are invaluable when hooking up in a spot with full hookups. They keep the sewer hose off the ground, and incline into the sewer connection, ensuring that the waste water doesn’t stay in the hose longer than it needs to.
*Other Random Parts: Just having a hose and some adapters doesn’t always get the job done; we keep a few other random things and spare parts available as well.
*RV Waste Hose Clamps: If your hose gets a hole, or crack you can cut the hose down, and use a clamp and still have a functioning hose, just maybe a bit shorter.
*Waste Cap: I have driven away from spots without this cap, and always have an extra now. Nothing worse than driving down the road leaving a trail!
*A box of latex gloves is always a nice to have as well! 😉
4. Electricity: RVs have filled up with lots of bells and whistles, and these bells and whistles need some electricity to keep them ringing & chirping! Most of the time, hooking up to electricity is as simple as just plugging in, but when it’s not simple, it can be a headache.
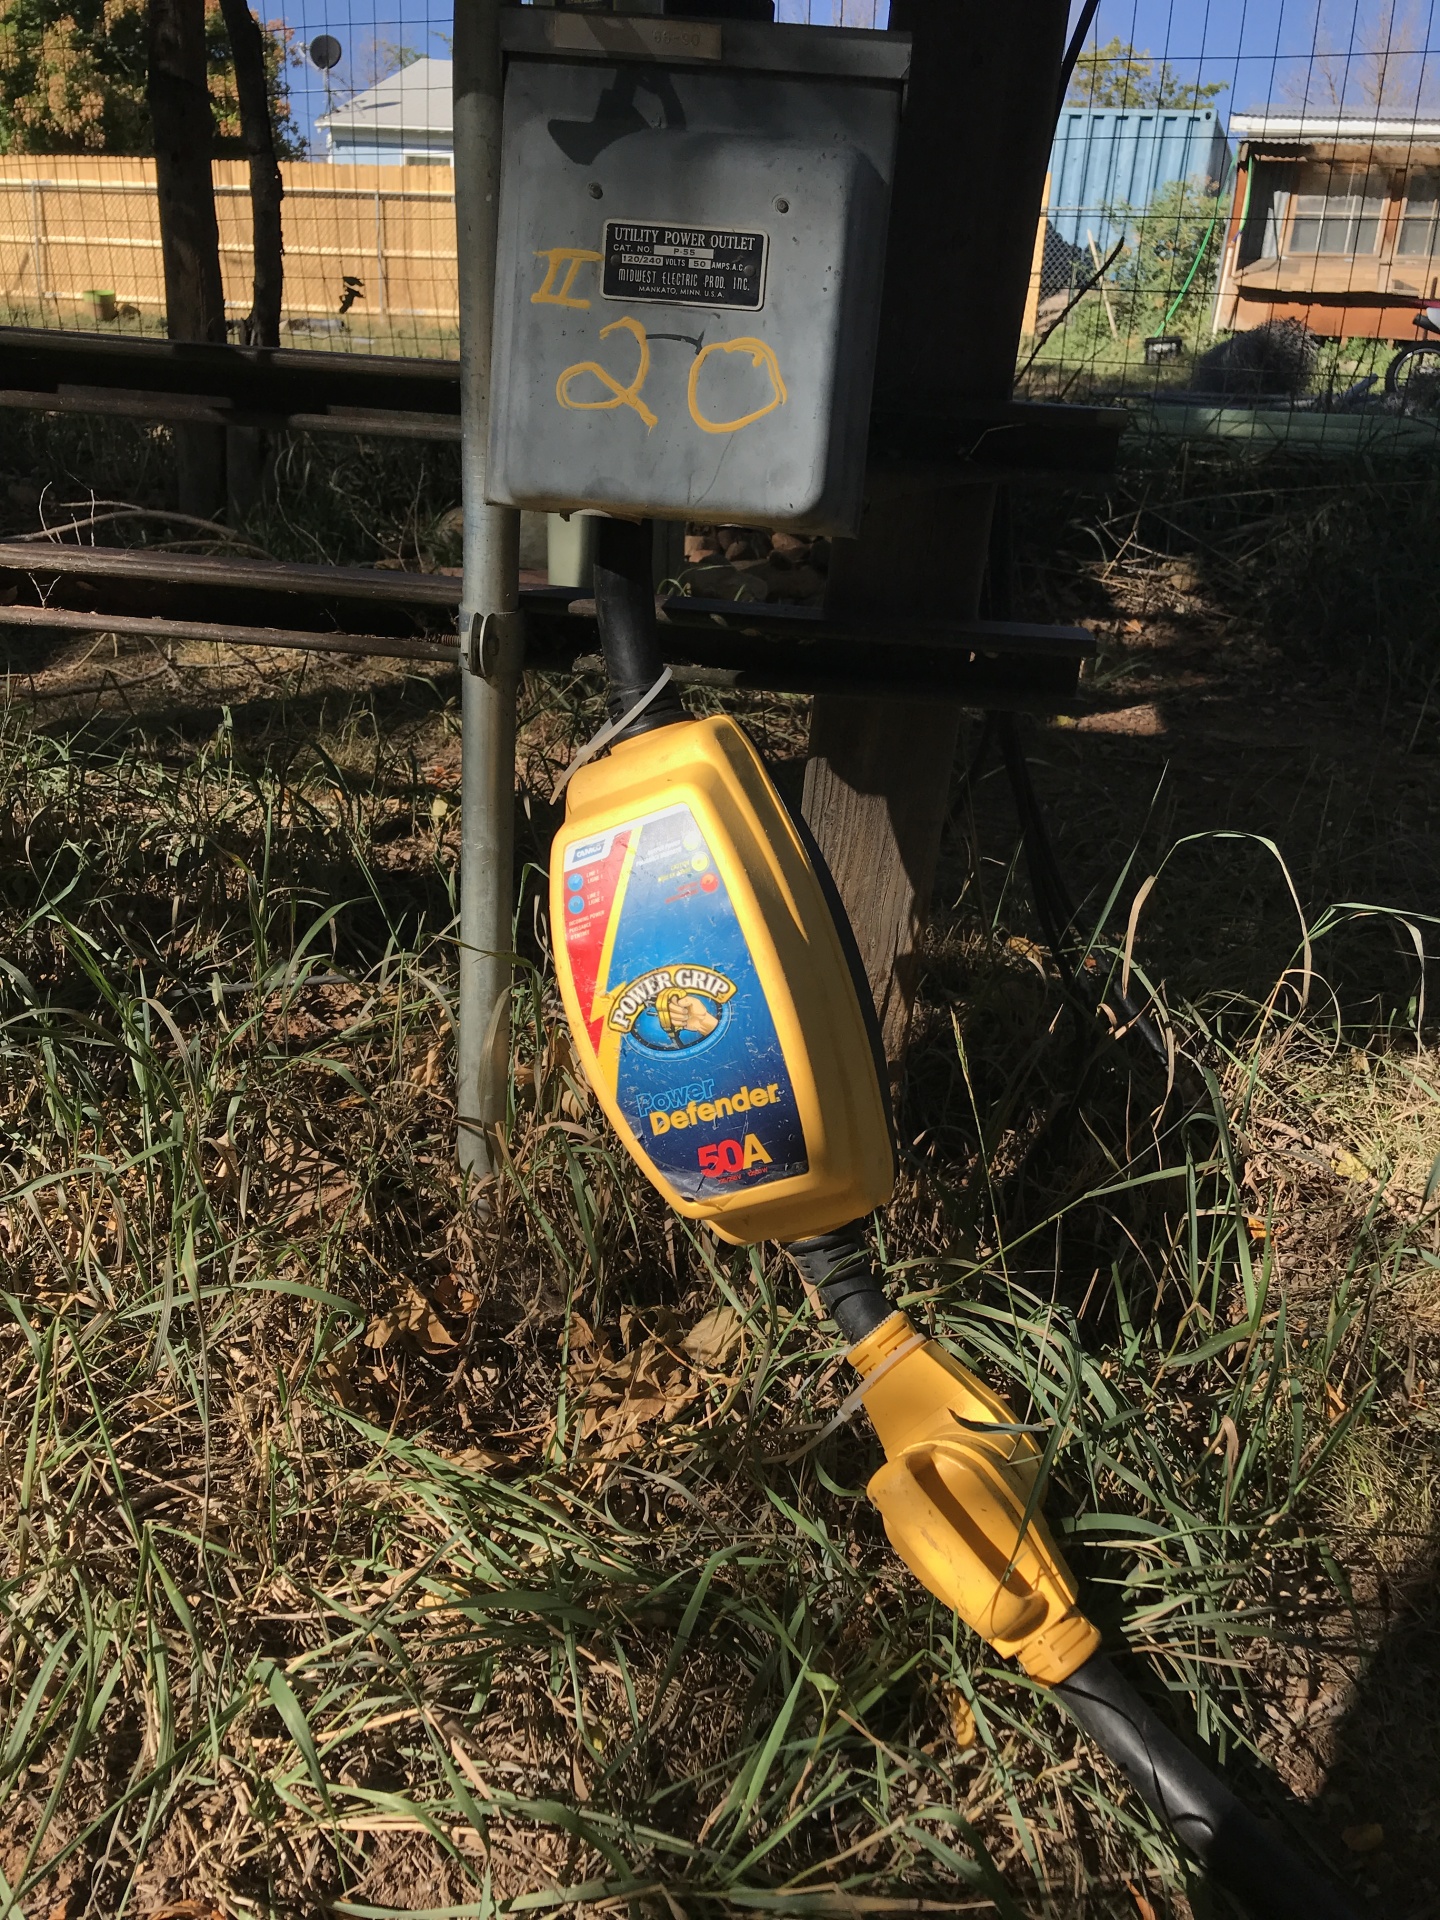
*Surge Protector: This is something we use religiously. Similar to what you use in your home to protect your TV and computer, this regulates the power from the pedestal both high and low, and will shut down power in the event of a huge surge, or low voltage. There are many sizes, shapes and features available so I will not go into great detail about these, but do your research and find what you feel most comfortable with.
*Extension cord: Depending on whether your RV is 30 amp or 50 amp, you should carry an extension cord. We traveled for months without ever needing one, but the one time we did need it, we had to run out and buy one before being able to plug in. Make sure that your extension cord is specific to your RV’s power. In addition, if you plan to plug into normal 110 outlets, make sure you have a good quality extension cord.
*Power Adapter: Again, in a perfect world, you pull into your spot, and you plug right in. But let’s say that your RV has a 50 amp system, and there are only 30 amp hook ups available? You will need an adapter. The most common adapter you will need will be a female socket of what your RV uses to a male of the other. Example, we have a 50 amp RV, and our most commonly used adapter would be a 50 amp female to a 30 amp male. This would allow me to use my normal 50 amp cable, with the adapter and plug right into a 30 amp pedestal. Another one we have used when Mooch-docking at family or friend’s houses without any RV hookups, would be a 30 amp female to 15 amp male. This will allow you to plug into a normal 110 outlet and at least keep your batteries charged, your lights working and your fridge cold. You definitely need to be mindful of what you run in the RV and the size and quality of your extension cord to the outlet.
5. Having a positive “be ready” attitude: Travel days can be fairly stressful; you’re towing your house behind you, and things don’t always go as planned so when you get to your destination, you want to get parked, and enjoy your time there. While it is nice that a lot of campgrounds have these items for purchase, if you need them, you’re buying them out of necessity and you’re going to be over paying. By traveling with these items, and extra sets of some, you’ll always be prepared, no matter what situation comes up.
Road & Home has put together a great “Ready for the Road Checklist” and we travel with extras of almost all the items listed on it. You never know how a campground is set up, or what may go wrong during your travel day, so having these items has saved us many a headache. The nice thing about Road & Home parts is they are available through Amazon, Lowe’s or if you’re lucky enough to be around a Menards, they carry them too. Check them out online at www.roadandhome.com
We are members of the Amazon Influencer program, this article includes many affiliate links, meaning, at no additional cost to you, we will earn a commission if you click through and make a purchase.
Amazon store with parts discussed above!

If you have any questions about any of the information covered here, please reach out to fumminsfamily@gmail.com.