What is the story?
We are helping a friend of ours, get this 1972 Dodge Tradesman B200 Camper Van back on the road. It was a field find and had spent the last 10 years as a summer house.
How did we find it?
I was attending the weekly coffee ☕️ talk at Keller Williams Realty Northwest Montana one Friday morning, and we were chatting about things we like to do. I mentioned wanting to restore an old VW bus. One of the agents in the circle mentioned that one of her sellers had one sitting on a listing, and it needed to be gone. So if I wanted it, I could go get it.
A little recon!
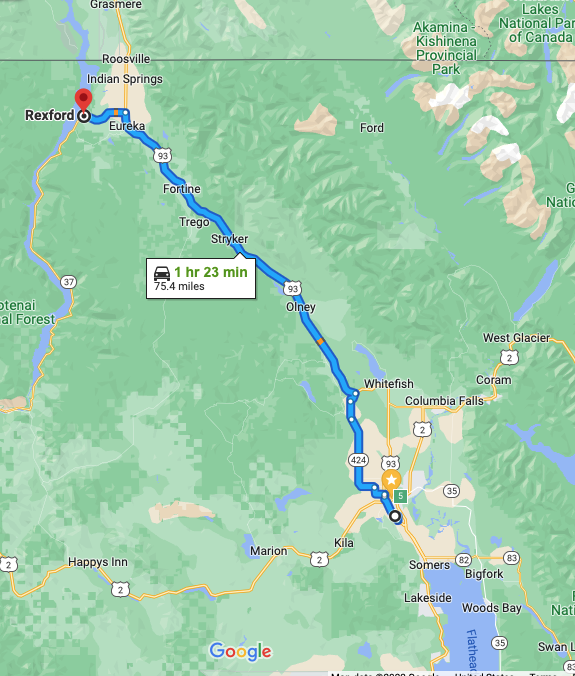
Before I committed to taking it, I wanted to go see what was there so I made the hour-ish drive from Kalispell up to Rexford (just outside of Eureka MT near the Canadian Border). When I got there, I was disappointed to find an old 1972 Dodge Tradesman B200 Camper Van, not a Volkswagon.
However I couldn’t deny that this van was cool, but I wasn’t interested in taking it on as my own. But a good friend of ours was wanting a camper, so we made a deal that we would go recover it, bring it home, and get it running and driving, then she would take over and remodel the camper.
Lets go get it!
This 1972 Dodge Tradesman B200 Camper Van had been sitting in the same place for a very long time. We didn’t know what to expect or which tools to bring. So we planned for the worst and brought extra tools we didn’t end up needing.
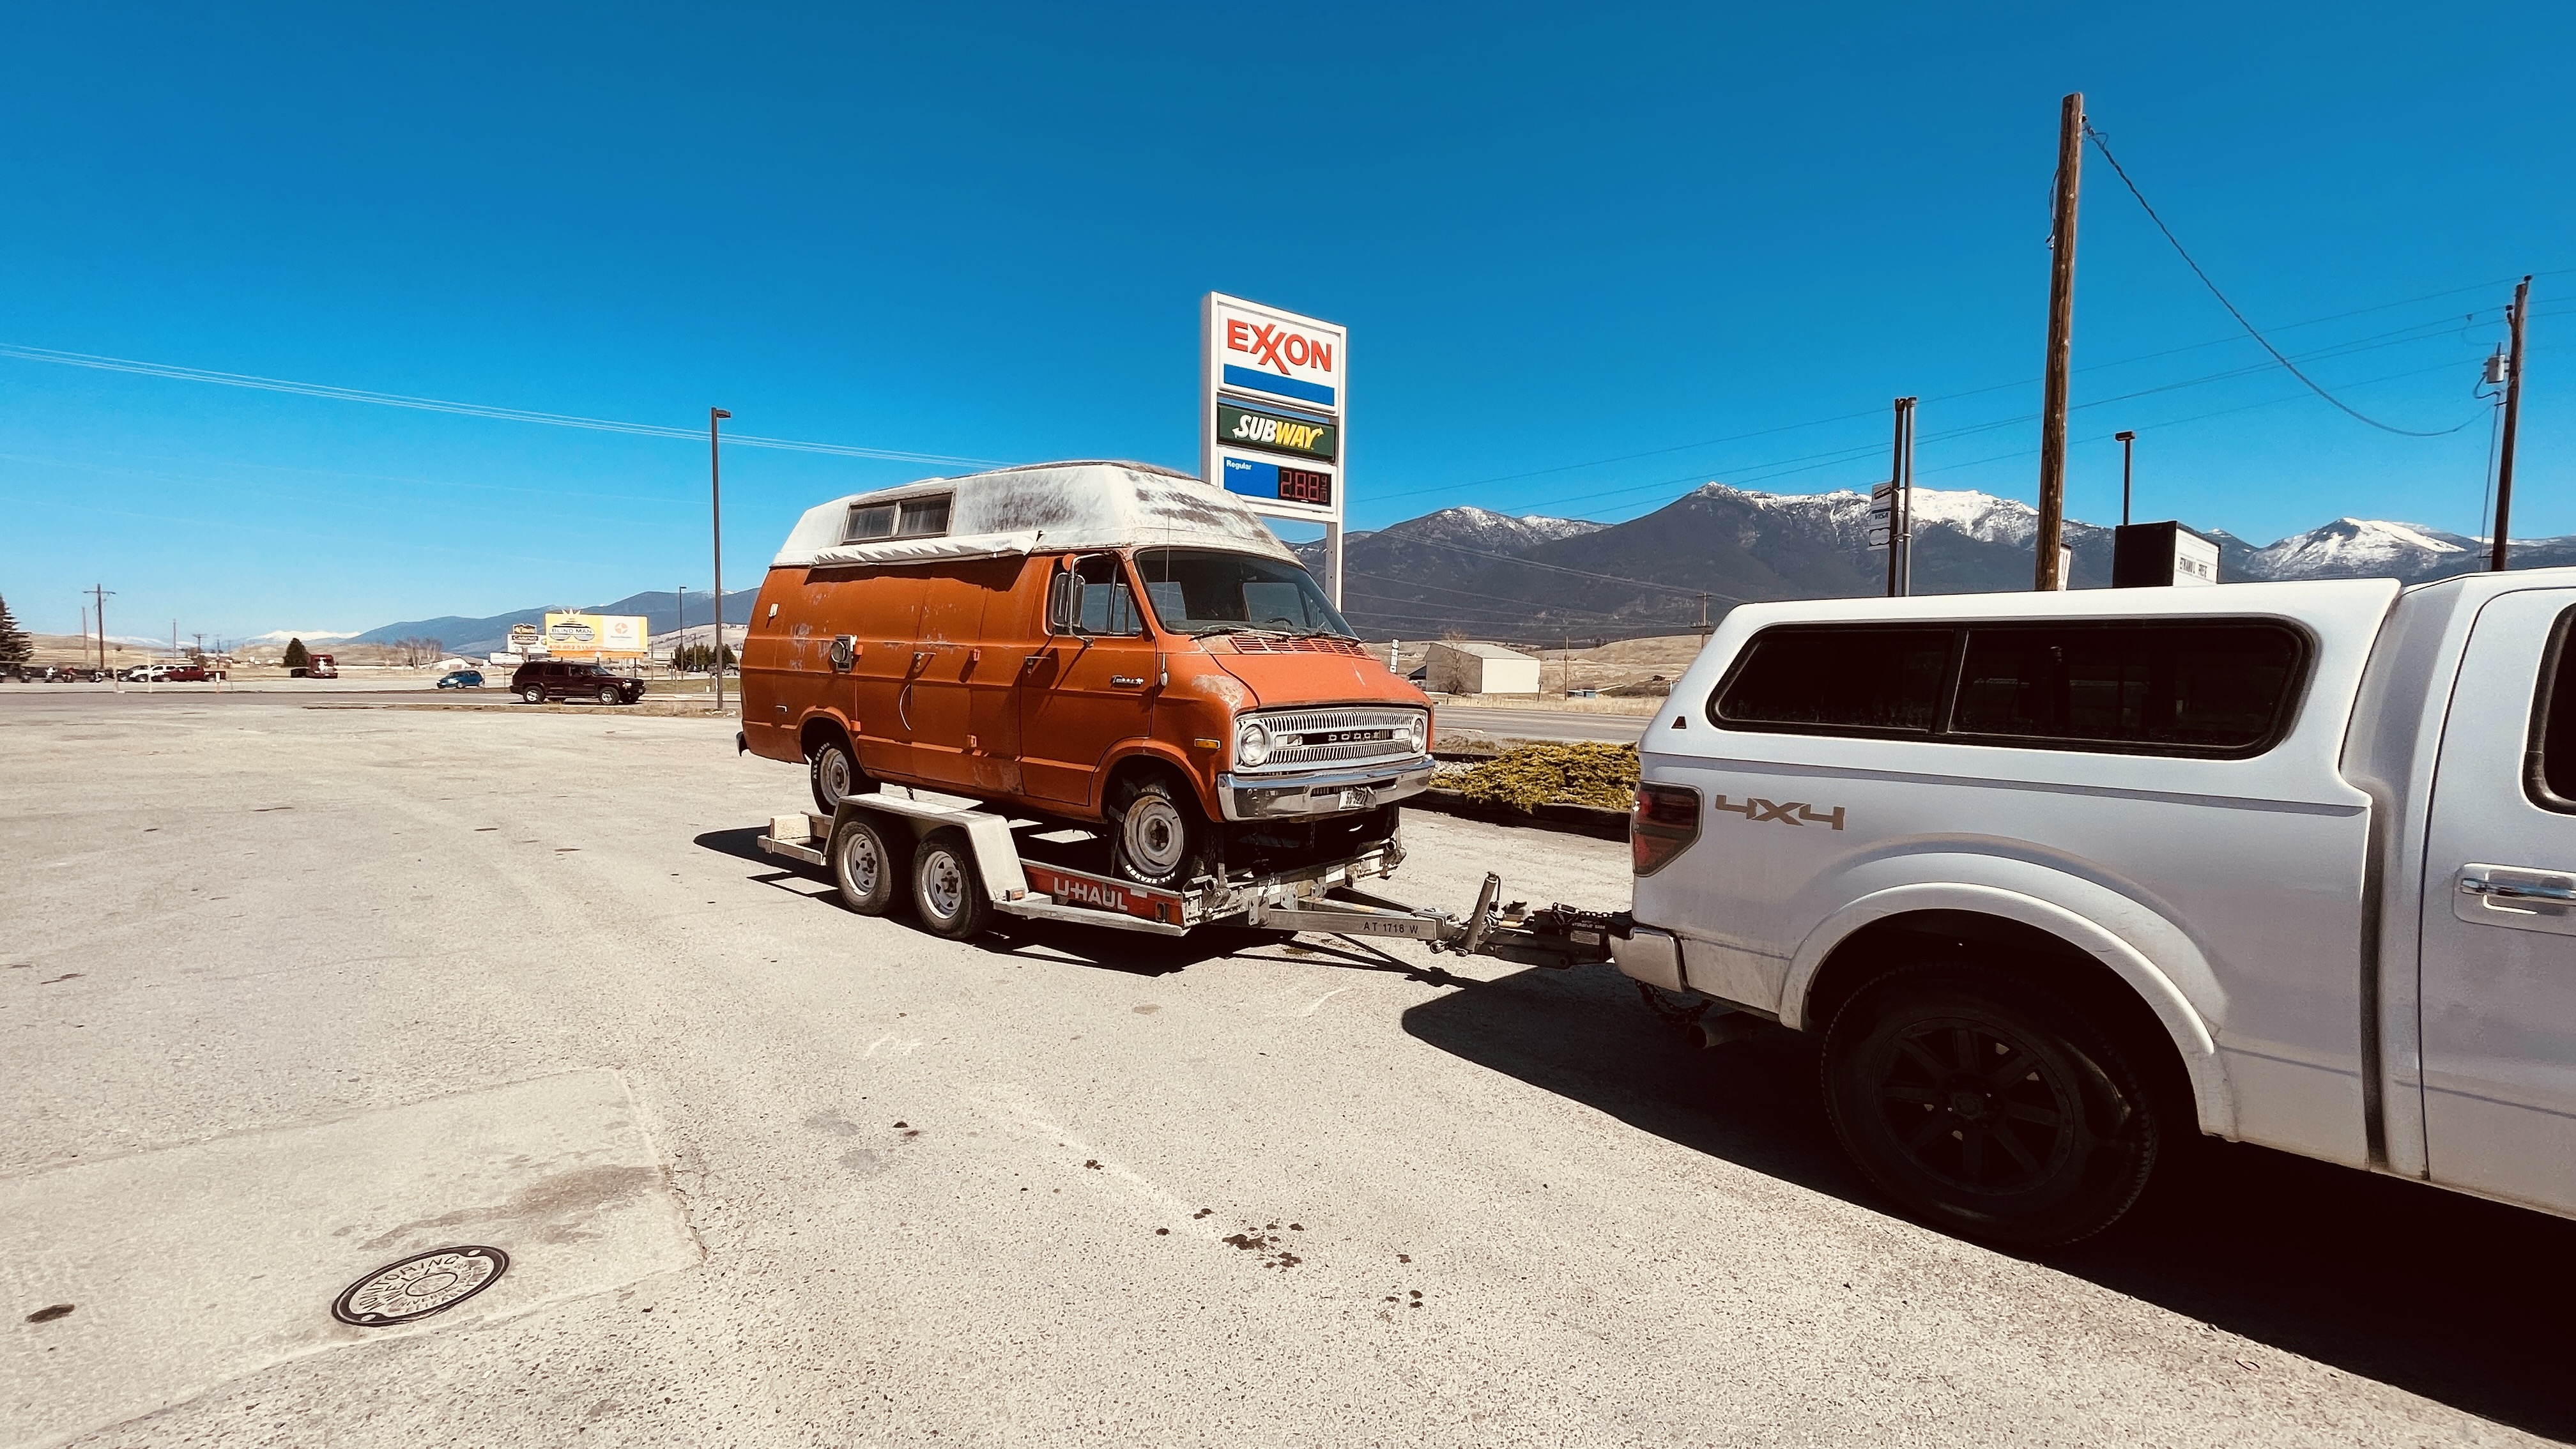
We don’t own a vehicle trailer, so we had to rent a U-Haul which ran about $60 for the day, and drove up to recover it.
The legend behind it?
The story goes that the last owner won the van in a poker game and then parked it up on his property to use it as a summer house. The van was locked up tight and the only residents in recent years appeared to have been mice. Overall the van was in pretty good shape for its age.
Since it was locked up tight, we had to break in. We brought a drill with various bits and were easily able to remove one of the larger windows & put James in through the opening. After a little bit of a struggle, we were able to get all the doors open and get inside.
How do we move it?
All the tires were flat, but we brought a small compressor and were able to get them all inflated enough to roll. We hooked the tow strap onto our F150 & pulled it off the property, onto the road through a little ditch. We lined up the U-Haul trailer & used the come along to pull the van up onto the trailer. Now I know a winch would’ve been easier, but we have very little use for one and a come along was a fraction of the cost so we went that route.
We got it secured onto the trailer & made the trip back to Kalispell. When we got to town we decided it was a good idea to go through the car wash with it on the trailer and get all the gunk off from it it’s sitting for so long.
Lets Dig in!
Once we got the van home it was time to dig in. We cleaned out all the nasty flooring anything that had been molded or just looked absolutely gross. It didn’t have a battery so I went to hook up a battery to try and start it or just to see what happens, and there was magic smoke at the bulkhead connector. With that happening, I knew there was shorts or something wrong with the electrical system and decided since this was a very simple vehicle that rewiring the vehicle part would be the best option.
I didn’t wanna wait until the wiring was done to keep trying to get this thing going, I wanted to find out if it would turn over or run. I quickly found that the fuel in the gas tank was pretty gross so the first step was to drop the fuel tank drain it out wash it out then I had to replace this pick-up and sending unit in the tank. I blew out all the fuel lines, and replace the fuel pump and fuel filter.
It Runs!!
As you can see in the video, after some finagling it did start and run. That was an exciting moment because we actually had no idea if it would run or not. We still don’t have an idea if it will drive, but we know it runs. That’s a good starting point!
Whats Next?
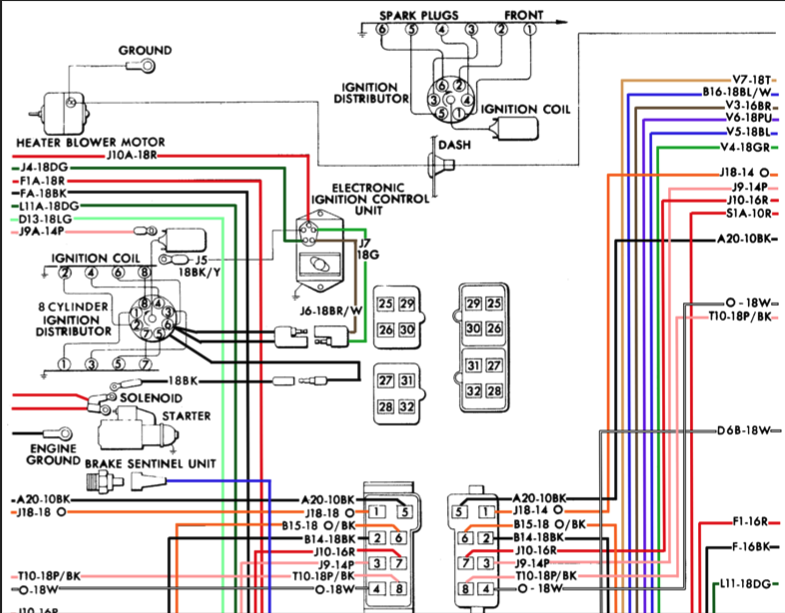
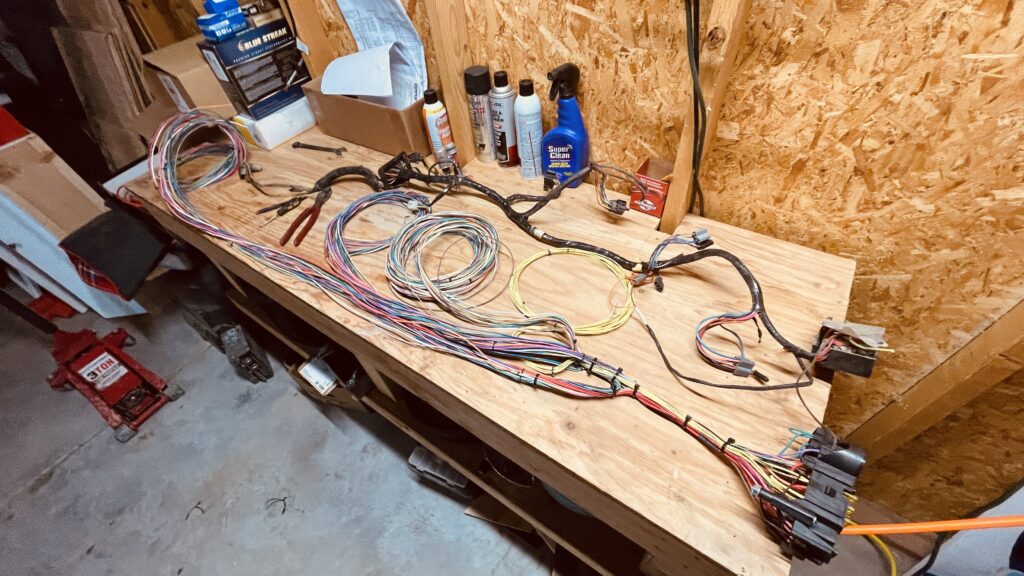
Now that we know that the engine runs, it’s time to dive into everything else lol. First thing is the wiring, I decided to go with a Painless Performance wiring kit. I have rewired a vehicle or 2 in my life, and wish I had known about these kits before. It is awesome! It came with a huge guide that told you what every wire, on every circuit did, and every wire was identifiable with the circuit name, the group name and the wire number all printed every couple feet on each wire. Then I found a detailed wiring schematic of the van itself and I printed it out and I literally traced all the wires on the original harness and match them up to what they’re going to be made it to on the painless harness.
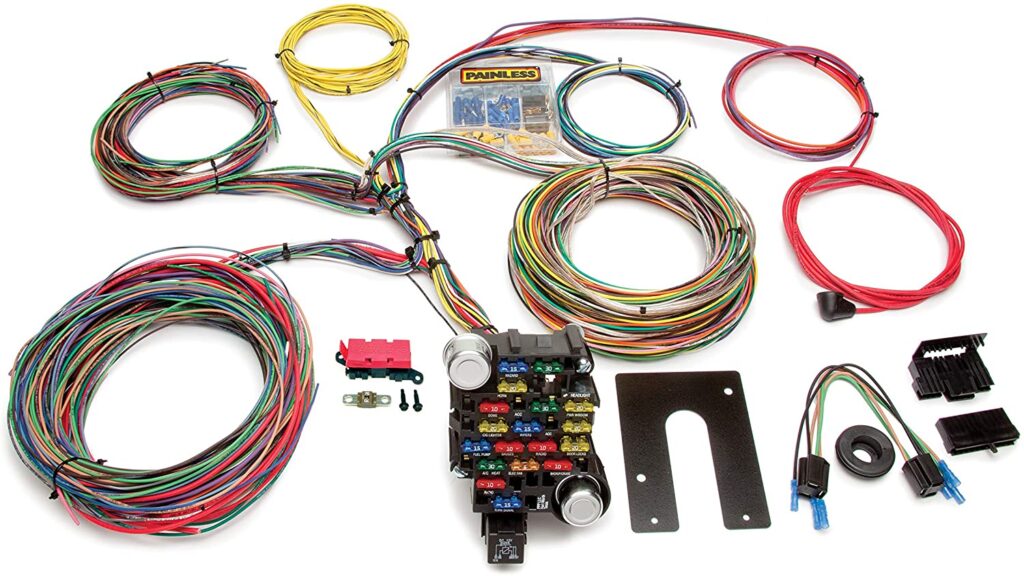
Although the painless kit was very complete and very thorough, there was still a lot of work to be done to get it ready to go in the van. The painless kit included more wires & circuits than I would need for this particular build so I had to go through and remove all the unnecessary wires. The painless kit had many more wires in circuits that I would use for this particular build so I had to go through and remove all the unnecessary wires.
I needed to get a few other things to help rewire this such as terminal connectors and tape to get this put together.